FREEFORM CONCAVE BRACELET
7/3/2015Jewelry design choices are limitless. What starting blank, stake, hammer to pick? We will explore the possibilities of a freeform blank being formed into a deep concave shape. After forming the metal from the inside of the curves, we will switch hammers and stakes and move the metal from the outside to totally change the shape and personality of the bracelet design.
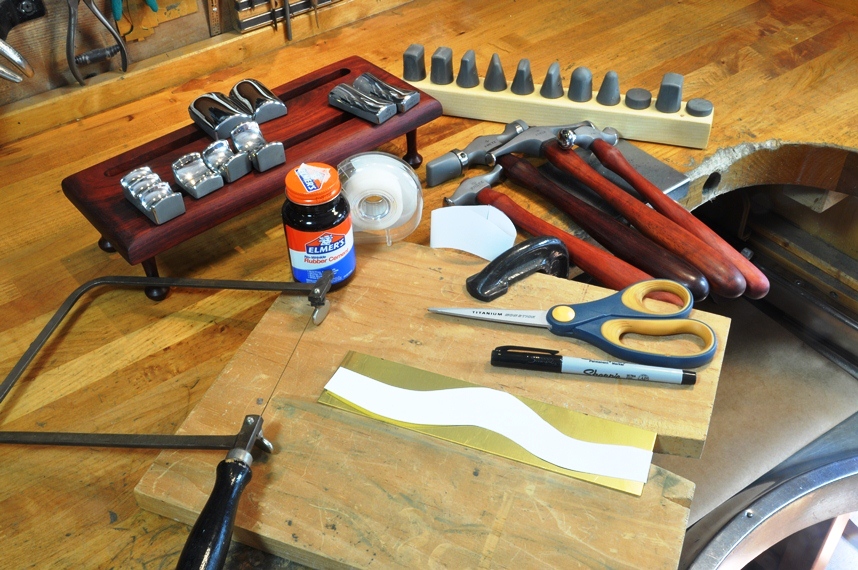
The original pattern is designed with paper and scissors to get a feel of the three dimensional possibilities. The silhouette can either be glued to 18 gauge sheet metal with rubber cement or two way tape to make the first pattern.
If multiples are to be made it is a good idea to save this first cut out and use it to trace future blanks with a black marker or scribe. Laying down a black marker line and then going over it with a scribe makes a thin line making it easier to follow with a saw blade and be more accurate. The bracelet requires a sheet of metal 2 inches by 8 ½ inches by 18 gauge.
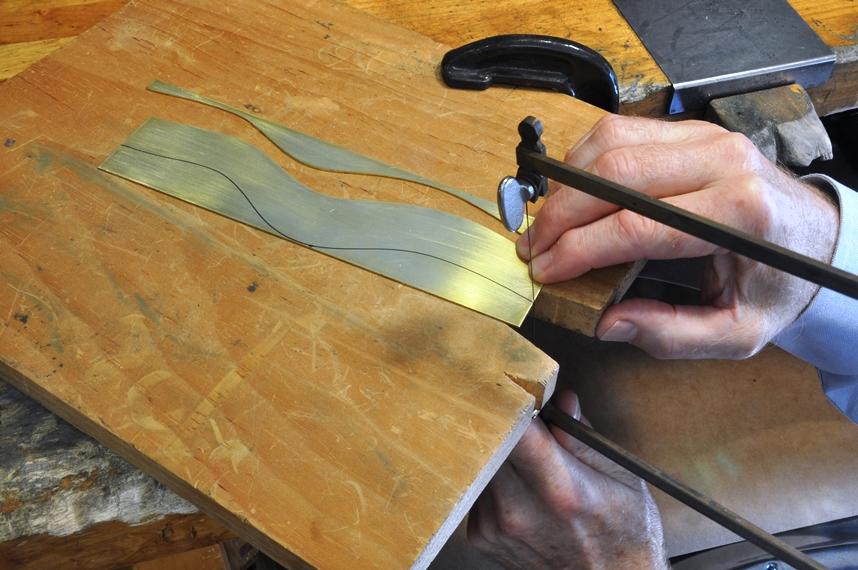
Using a wide pine board as a v-block or bench block to cut out large and long shapes makes a very stable platform. A deep saw frame of at least 5 inches is required to make the long cuts. The brass sheet will have to be reversed to cut a line deeper than the saw frame. A very light rubbing of the saw blade’s side with blade lube makes the process smoother. The saw teeth need to have at least two teeth riding on the metal thickness so the blade doesn’t snag. Use a 2/0 blade on the 18 gauge cartridge brass. Cartridge brass is an alloy of 70%copper and 30% zinc. This is a good choice for forming projects when annealed.
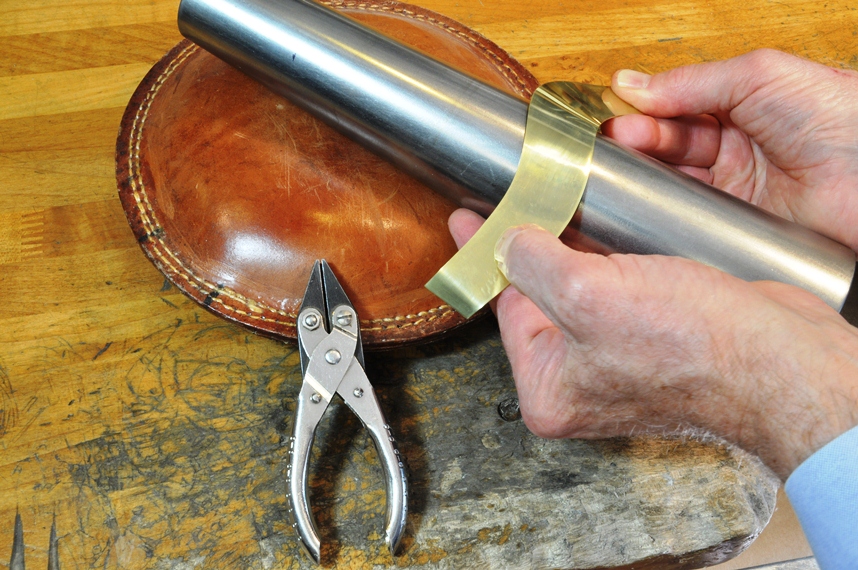 After the blank is sawn and rough areas smoothed with a #2 crossing file, the brass is annealed and pickled. The next step is to prepare the area to be soldered. If the two sides are flat when they meet, it is much easier to place the solder so it stays on the seam. Bend each end slightly with parallel pliers about ¼ inch from the ends. Next, curve the entire bracelet so the ends meet and are flush around a bracelet mandrel. An alternative bending method would be to use the horn of an anvil, T-stake or an M-117 insert stake with a flat curved surface.
Solder the bracelet ends in a soldering pan with lump pumice or other heat reflecting surface. Use the corners of fire bricks to hold the project so the ends stay even while the heat is applied. If the bracelet is not firmly held the metal has a tendency to “dance” and the seam may misalign.Using the brick corners also keeps the metal from absorbing too mush heat.Use hard silver solder or a brass solder that has a melting temperature well above that of an annealing range of about 1200F. Dull red in a darkened room indicates the right temperature range.
Use a generous amount of white Handy flux to keep the soldering area clean while the solder flows. Solder flows to the hottest area; pulled down by gravity and into the seams by capillary action, so use all these characteristics in your set up. Place the solder along the seam and use a pointer to push it back into place if it wanders. Remove any trace of solder that doesn’t flow into the seam with riffle files. Use rubber wheels with a flexible shaft machine or 320 emery cloth or paper to clean up the file marks.
The HMR-107 Insert hammer is a good forming hammer as the nylon ends won’t mar or stretch the metal while raising or sinking it. This new insert hammer has eleven replaceable ends that fit the new Fretz M-100 Stakes. The bracelet is rounded on a M-117 Flat Cuff Stake and the seam compressed to make the sheet an even thickness. The longer bench mounted holder, H-1L, is needed for the M-100 series stakes. The receiving holes are the same size for both the original H-1 Holder and the H-1L Holder.
Another holder that accepts the M-100 stakes is the T-101 T-Stake .
This can either be held in a vise with a V-101 holder or bench mounted with an H-101 holder. The advantage of the T-101 T-Stake is that the reach is longer for very large bracelets or small hollowware. Additionally, the larger H-101 and VH-101 holders are designed for a line of raising T-Stakes.
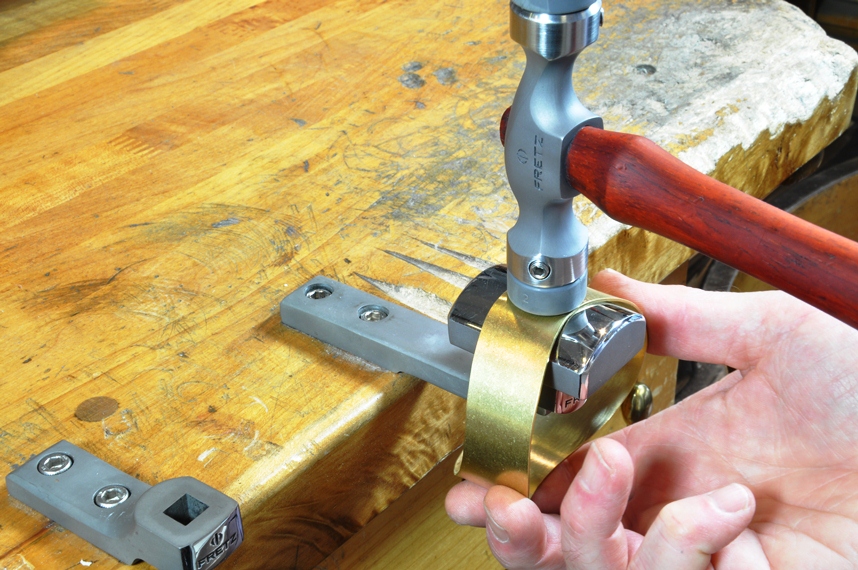
The first step of forming is to mount the M-104 stake into either the H-1L or T-101 holder and use a crosspeen hammer to sink the form into the stake. By going completely around each edge first the piece will stay round. Hammer the middle lump down last. The number #9 nylon end of the HMR-107 hammer fits this stake accurately and will produce a relatively smooth shape.
After completely covering the bracelet with hammer blows the metal will need to be annealed. Each hammering and annealing cycle is called a course.
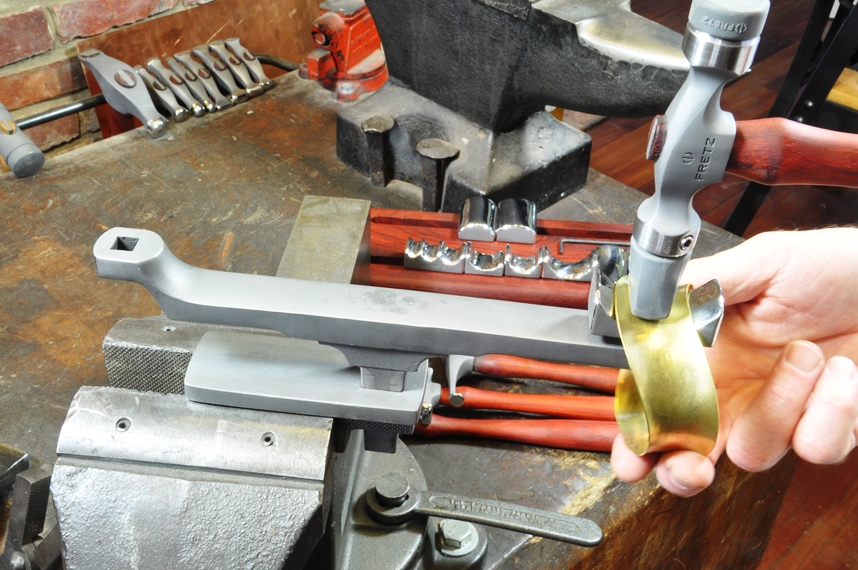
The hammer insert end has been changed to the #7 end in the HMR-107 and the next stake used is the M-105. The M-105 and all the M-100 series stakes have a main curve that if extended will make a two -inch diameter circle.
We will call this the primary stake curve. The curve of the stake that is right angles to the primary curve we will call the secondary curve. The two inch diameter surface of the primary curve is a useful size for bracelets.
The M-105 is a smaller length stake, having a steeper secondary curve than the M-104. As the hammering and courses progress through different stakes with steeper secondary curves, the piece will develop a deep U-shape.
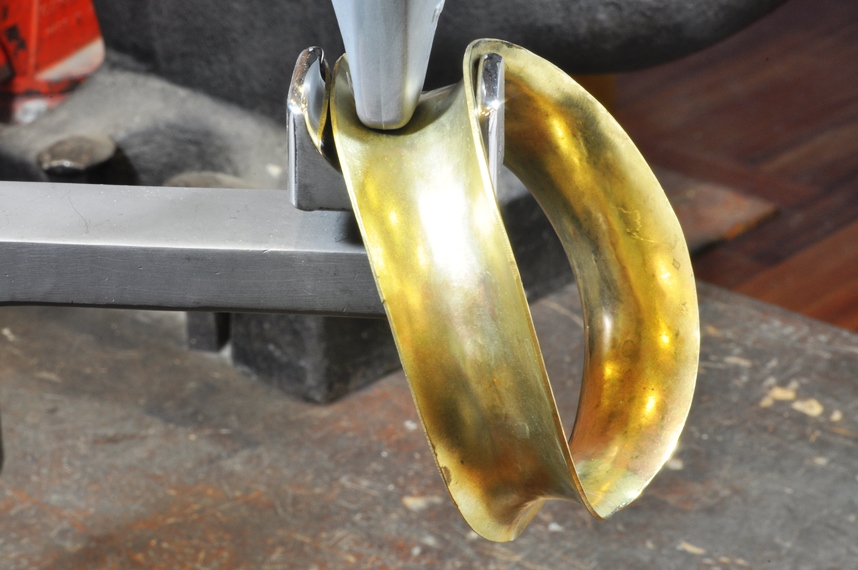
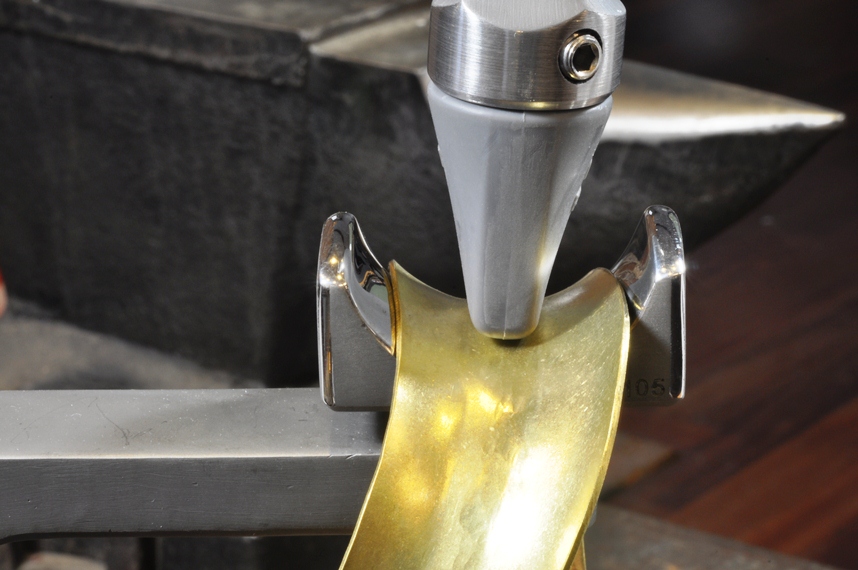
After annealing, the edges are turned up even more on the M-106 stake. It is possible to make these forms on a mandrel or the horn of a stake, but holding the metal at a precise angle as it is rotated around the stake is a real challenge.
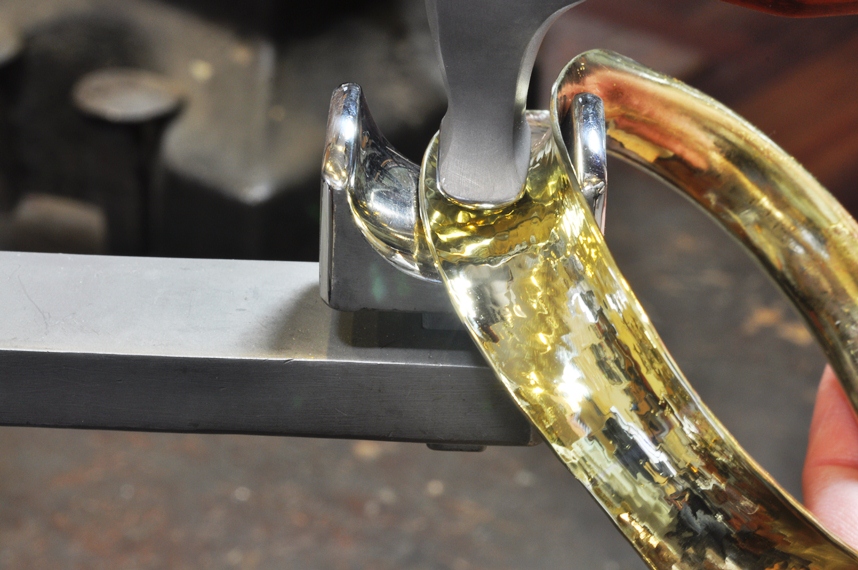
Planishing with overlapping hammer blows will remove the subtle forming ripples. A curved crosspeen hammer will make the internal curves smooth and leave a light hammer texture. The wider HMR-9’s smaller end is used for broader marks. If a finer texture is desired the narrow curved crosspeen HMR-8 will work. Start planishing in the middle and rotate the hammer blows around the piece until they meet again. Start a new track next to the first and continue the process until the entire surface is covered with even marks. It is very important to anneal for the final time at this point.
The next step is to polish the inner curve of the bracelet. Once the shape begins to close, it is very difficult to get polishing wheels into the recesses.
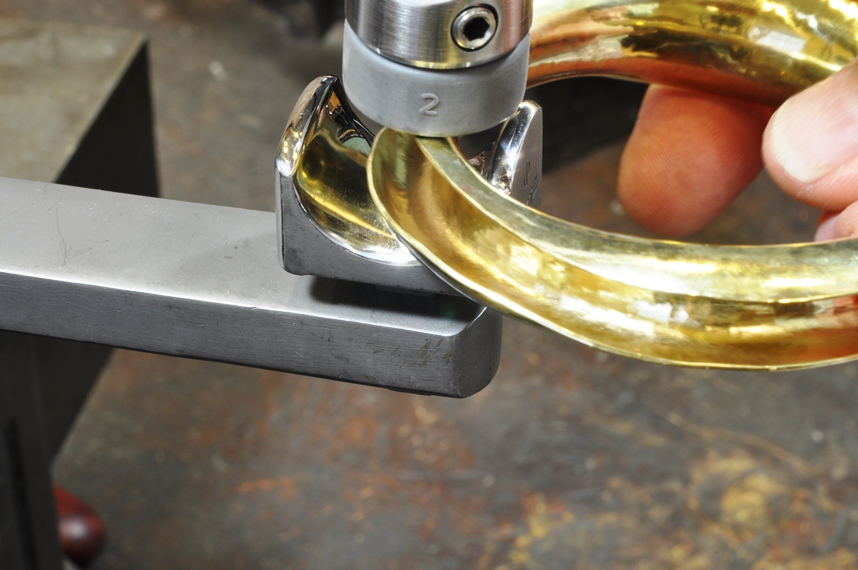
The stake to use next is the M-106A. It looks like the M-106 but has some major changes. The primary curve is now almost flat and the front edge of the stake is lower than the backside. The flatter inner curves makes a good support for the bracelet as the shape is closed from the outside with a flat nylon or steel hammer.
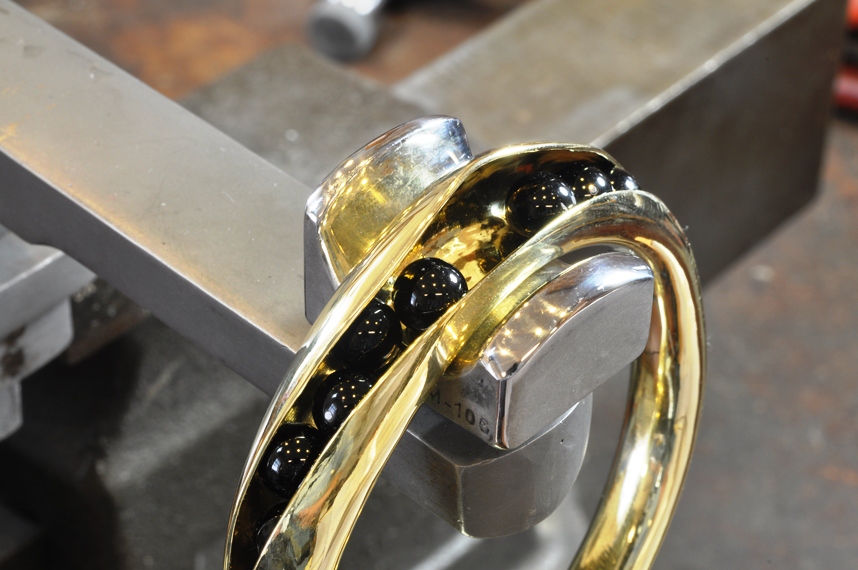
The concave track of the bracelet is a great place to insert beads, round pebbles, baroque pearls or glass. It is important to leave an open area to slide them in. If a smooth outside finish is desired, file the bracelet with a #2 crossing file. The curved shape of this file is ideal for finishing texture free bracelets. Wrap a strip of #320 emery cloth or paper around the crossing file and bring to a matt finish with even strokes. The first polishing is with bobbing, or a similar aggressive compound, on wool buffs. The inside area can be finished really well using a goblet buff or a large flex shaft buffing wheel of about 1 to ¼ inches. Be sure to use a mandrel at least 1/8 inch diameter shaft so it doesn’t bend with the big buff.
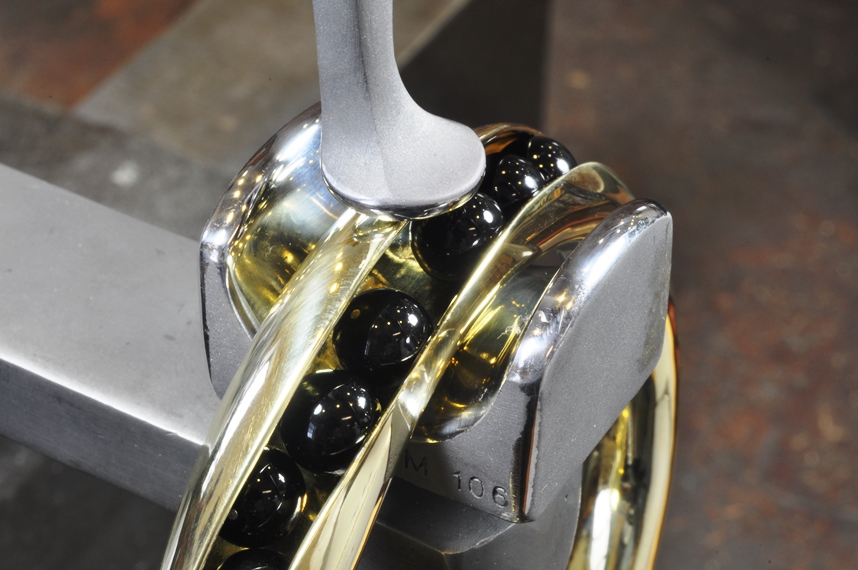
Close the bead portal with a hammer like Michael Good’s planishing hammer, the P-1. What makes this hammer useful is that much of the metal around the face has been ground away so the jeweler can see what is happening as the metal closes down around the beads. The smaller end fits down into the stake to maintain the fluid curve of the metal. Very light polishing may be required to remove any hammer marks. The finished piece allows the 8mm onyx beads to float freely. Fine silver wire was glued into the beads and polished flush to add kinetic detail to the moving elements.
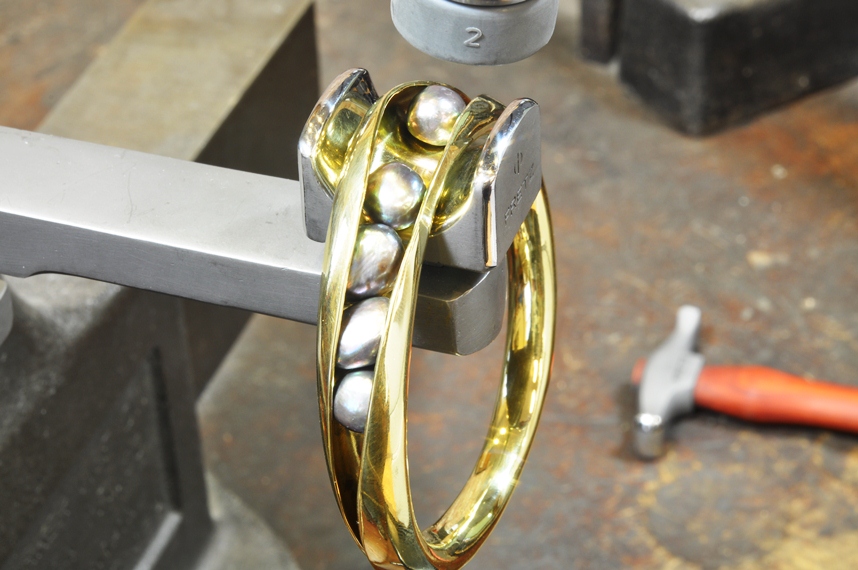
By substituting different gems a whole new look is accomplished in the same design. This is an example of how different baroque pearls look from the uniformity of the 8mm black onyx beads. The piece has a polished exterior with textured interior. Change the outside to a texture and a different mood is generated. The endless variables of this craft are what keep the designer-craftsmen engaged.
This design and others are shown on the DVD: Wide Concave Bracelets with Bill Fretz